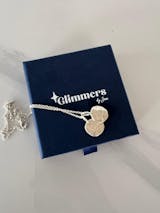
I ordered a custom necklace from Glimmers by Jess with Simba (dog) on one side and my two cats on the other, all three of my babies together, close to my heart. At the time, I had no idea how meaningful this piece would truly become. Shortly after, my sweet Simba passed away, leaving a hole in my heart that I’m still learning to live with.
Wearing this necklace every day brings me comfort. It feels like Simba is still with me, close to his siblings, and close to me. It’s become more than jewellery it’s a keepsake of love, connection, and healing.
What Jess creates isn’t just jewellery… she creates memories you can hold, moments you can wear, and pieces that keep the ones you love close.
I’m so grateful for this necklace and for the care Jess puts into her work. It means more to me than words can say.
I love the necklace Jess made for me, freezing my toddler’s fingerprint in time - something that i can cherish forever! He is growing so fast and these are the sort of things we wish we could revisit. Tiny finger and tiny toes! One day his hand will be bigger than mine.. ha!
The whole process is really beautiful too, and I can’t thank Jess enough for doing this.
My necklace came out absolutely perfect! Jess went above and beyond and I am so I love with the final outcome. I highly recommend to everyone, the perfect keepsake of your fur babies 💗
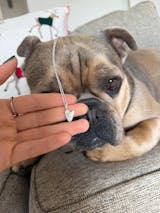
I absolutely adore my gold vermeil heart pendant from Jess - it is just the perfect everyday necklace to wear, as it goes with any of my outfits. I can finally take a piece of my dog Kilu with me everywhere I go!
Absolutely adore my fingerprint necklace. The service and communication were amazing from start to finish, so easy and thoughtful. The necklace itself is beautiful and such a special keepsake. I love it, and my boys do too. I can’t wait to eventually add gemstones to it and make it even more special. 💛


